Search Google

Friday, 27 March 2015

Gmail Account For a Website


                      Steps To Create a Gmail Account For a Website


Note: This service is no more free. Google now charges in dollars every new signup!
Google Apps Services 
Part1: Create Free Email address For your domain with Google Apps
Note: This post may seem too much techy but its really simple to apply and all fun! So act like tomb boys and give it a try. :)

You will get a free 10GB storage to save all your emails no matter how loaded they may be with rich media.
Follow these easy steps:
  1. Go To Google Apps for Domains
  2. Submit your website address without typing http://
  3. Then fill up the vacant blanks with required information. Keep your username simple because this will be attached to your domain name to create your custom Gmail account username. In my case I choose Mohammad for my sister blog.
setup email with googleapps
      4.  Keep Alternate email address the same as your personal Gmail ID or any ID  that you use frequently.
      5. Click the submit button to create your account

      6. You have now successfully created an account with Google apps. Now you need to verify that you actually own the domain. You will be given two options Express and Custom. Choose express.
express and custom googleapps
   7.   Click the next buttons till you get to Domain verification page. Here you get 5 options to verify your domain which are:
  1. Upload HTML File      (Recommended Method)
  2. HTML Tag            (under alternate Methods tab)
  3. Google Analytics       (under alternate Methods tab)
  4. Domain Name provider       (under alternate Methods tab)
Choose the second option of HTML Tag because it is the easiest of all. Copy the simple Meta tag and paste it inside your template just below <head> section.
Tip for Genesis Users:
Once done, hit the verify button and you are half done.
domain verified
Click the continue link and you will be taken to Google Apps Setup wizard. You may keep all options default and keep clicking next till you reach setup Gmail:
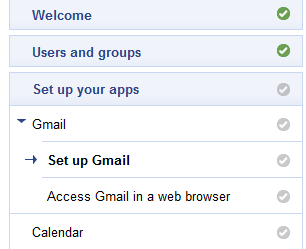
set up gmail
Choose other from the drop down box which says "Choose your Host" Click Next
Setting up MX Records
Here you will be given four MX entries that you need to submit to your webhost.
MX records
You will need to log into your web host account and navigate to DNS Manager or DNS settings. DNS zone is also called DNS Management, Mail Server Configuration, or Name Server Management, depends on your webhost. I will be sharing here the settings for hostgator here which will give you a clear observation on what to do.
Setting For HostGator:
  1. Log in your Control Panel
  2. Click the MX entry icon just under Mail
  3. Choose your domain
  4. Set Email routing to Automatically Detect Configuration
  5. Now enter 5 MX entries one by one inside the Records box.  These MX entries are given to you by Google apps. While entering the destination remove the dot in the end. For example ASPMX.L.GOOGLE.COM. should be entered as ASPMX.L.GOOGLE.COM
MX entry hostgator
     5.  When everything has been entered correctly it will look like this:
MX entries for googleapps
Note: If an MX entry exists by default, you may delete it and keep only the above 5 MX entries. It will take 24 hours for your Email to connect to Google servers so be patient
Go back to Google apps and keep on clicking next till you complete the wizard. Though completing the setup wizard is not necessary but to avoid the irritating prompting messages better complete it.
Congratulations! You have now successfully created a custom Gmail address for your website. .


 ---------------------------------

All settings From Gmail

Follow these easy steps:
  1. Log into your Gmail account
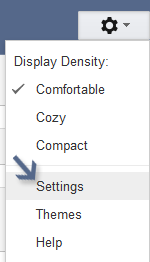
  2. Click on settings
gmail settings

        3.  Click on Accounts and Import tab
         4. Where it says "Send mail as:"    click the link that says:

add another email address
         5.   In the window that pops up, submit your website name in the Name entry, type your website email address inside Email address, uncheck the box that says Treat as an alias, in the Reply-to address you must submit your Gmail id so that emails sent to your domain id are received at your Gmail id.
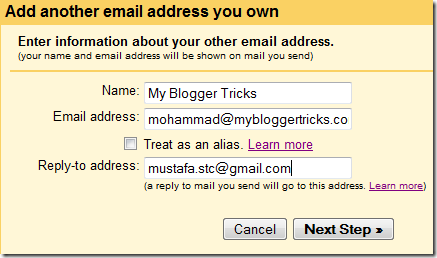
connecting accounts to Gmail
          6.  Click Next step. You will now be asked whether you want to send emails through Gmail server or your website  SMTP server. Choose Gmail because what can be more faster than Google? :)  Select the option Send through Gmail (easier to set up)  and hit Next step
          7. Now click the verify button and then visit your Domain Email account to copy a confirmation code that Google sent.
If you have followed our previous tutorials then the web address for your Google Apps Email address would look like this:
https://www.google.com/a/your_domain.com

How To Implement Google's Sitelinks Search Box On Your Website?

Search sitelinks
Sitelinks are Google's way of letting users know what links could possibly be most relevant to them. They help users find content more quickly. Google implemented search sitelinks to facilitate users and make it easier for them to search for and reach the desired content on your site directly from SERPs. A lot of webmasters miss out on this opportunity though. Compared to other types of markup, implementing search sitelinks is easy. Today, we'll show you how to easily set up yours.

Wednesday, 25 March 2015

WordPress website to mobile and Plugins

What is a WordPress Plugin?

A plugin on WordPress is simply a program, or programs, that are used to complement the core installation of WordPress. In other words, a plugin enhances a user’s experience on WordPress because it handles certain things that WordPress couldn’t, such as improve SEO, monitor comments for spam, or pretty much anything that can improve your site based on its specific needs.
It’s been said that plugins were the product of developers who wanted to get the most out of WordPress without having to completely alter the original WordPress code. This simple idea of providing users with an extra add-on quickly took off and developers went all out in coming up with useful plugins. Today, there are around 30,000 WordPress plugins, which begs the next question, – which plugins should you use?
Well, that’s entirely up to you. It all depends on what you’re looking to get out of your website. And, that’s the great thing about having so many plugins and your disposable – you’re bound to find one that’s perfect for you site.
However, we can point get you on the right path by sharing the 10 most popular WordPress plugins currently available, according to WordPress.org. As an added bonus, we’ll also discuss what makes them so popular among WordPress users.

https://www.dudamobile.com/responsive-website

WordPress website to mobile and  Plugins .

http://premium.wpmudev.org/blog/plugins-optimizing-wordpress-site-mobile/

JetPack

jetpack
A single plugin that can supercharge your website and give you a lot more than just a mobile responsive design. With over 33 specific features, Jetpack aims to be more than just a plugin; it wants to be the package you can’t do without.
Along with “Mobile Theme” – the feature you can use to optimize your WordPress site for mobile devices– there’s the ability of using contact forms, custom CSS, transforming your image galleries with Carousel, and much more. You can further customize your theme if you’re familiar with CSS and bit PHP coding.
JetPack also has site verification tools, “photon” for accelerating your site speed, and a direct integration with your Google+ page.
Ideal For: This plugin is good for you if you are looking free solution to make your WP based site mobile friendly.
Download JetPack Plugin

WPtouch Mobile Plugin

WPTouch
You just can’t ignore a plugin used by more than 5.5 million blogs. WPTouch Pro is a mobile response focused suite with a full-blown WPTouch Theme, which is about times times faster than responsive sites with touch enhancements (ready for multi-screen), and a crisp retina interface.
The WPTouch Plugin features “Infinity Cache” to make your website blazing fast using mobile caching. Images are scaled via CSS and the plugin delivers mobile-optimized images according to the device. WPTouch uses extensions (much like add-ons within a plugin) to help render separate content for mobile devices, along with the images and faster rendition mentioned above.
WPTouch Pro : Starting at $49
They also offer a premium version available with lot more options. You can check detail list of features and different pricing plans.
Ideal For: Those who are looking to give a unique user experience to desktop and mobile users. This plugin has an add-on (enable server-side optimization) that allows you to supply templates specifically designed for mobile devices by detecting a mobile device is accessing your site.
Requires: WPTouch requires WordPress version 3.6 or higher.
Download WPTouch Plugin

WP Mobile Detector

WP Mobile Detector
What if you aren’t sure whether your users are still on mobile or not? How can you possible cater to every page load request not knowing where the request originates? That’s about half of the world’s mobile user base, according to Gartner. WP Mobile Detector helps you with just that.
The plugin automatically detects the device accessing your WordPress website and loads a compatible mobile theme, depending on the device. It features advanced analytics, covers more than 5000+ mobile phones, formats content to suit mobile devices, and also comes with seven pre-installed mobile themes.
Ideal For: WP Mobile Detector is best choice for you if you have a non-smartphone audience. This plugin will detect whether request coming from a smart phone OR a standard mobile phone and loads a compatible mobile theme for even standard mobile phone users.
WP Mobile Detector PRO v2.6 : $50
The premium version of WP Mobile Detector PRO allows users to build a custom mobile theme with inbuilt mobile theme editor!
Download WP Mobile Detector Plugin

WordPress Mobile Pack 2.0

WordPress Mobile Pack 2.0
What if you want to take user experience up a notch and make your WordPress website look and feel like an app?
The WordPress Mobile Pack 2.0 allows you to package and deliver your existing content across platforms, operating systems, and devices. The plugin allows cross-platform access, a responsive user interface, a ready-made theme with six abstract covers, and post sync. It also allows you to customize appearance (including colors and fonts).
The theme also integrates into analytics and features a “full-screen” mode for those who want to access your “appified” theme on desktop.
Requires: WPtouch requires WordPress version 3.5 or higher.
Download WordPress Mobile Pack 2.0 Plugin

WP Mobile Edition

WP Mobile Edition
Pure mobile sites are even better than responsive design. WP Mobile Edition helps you to turn your existing.

1. Jetpack by WordPress.com

screenshot-1
Image Source: WordPress.org 5/28/2014
If you’re looking to give your self-hosted WordPress site a little boost, than look no further. This is an easy to install plugin that is frequently updated. More importantly, however, is that because Jetpack has so many features you may be able to reduce the number of plugins.
What features does Jetpack include? Here’s just a several of the 30 features:
  • Through Notifications in the Toolbar you can Monitor and manage your site’s activity.
  • There are Email subscriptions for your blog’s posts, as well as your post’s comments.
  • A social networking enabled comment system.
  • The CSS editor allows you to customize your site design without modifying your theme.
  • A mobile theme will automatically streamline your site for visitors on all mobile devices.
  • After the Deadline, which is a proofreading service that can improve your spelling, style, and grammar.

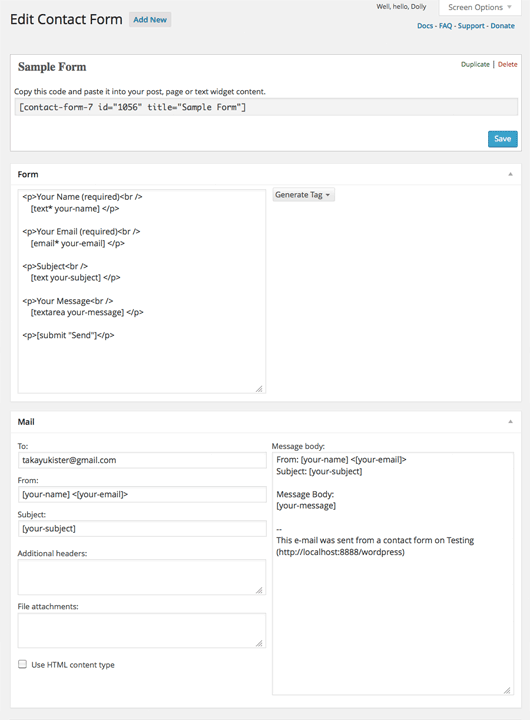
2. Contact Form 7

screenshot-1
Image Source: WordPress.org 5/28/2014
Contact Form 7 may claim to be “just another contact form plugin,” but clearly it’s attracting WordPress users after being downloaded over 17 million times. Perhaps the popularity of this plugin is the fact that it’s extremely flexible and can help you manage multiple sites. It can also support Ajax-powered submitting, CAPTCHA and Akismet spam filtering.
Many users of the Contact Form 7 plugin have claimed that it’s the best contact form because of its unique design, great support consistent updates and easy installation and implementation.

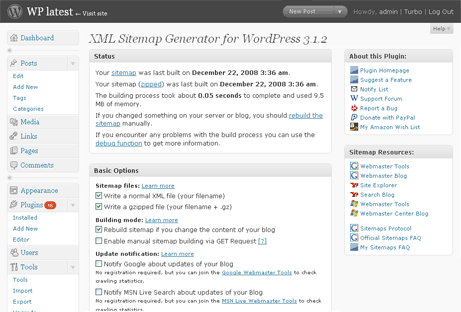
3. Google XML Sitemaps

screenshot-1
Image Source: WordPress.org 5/28/2014
As you know, getting ranked by the top searches, such as Google and Bing, is a big deal for any website. However, it can get challenging and tricky to have search engines index your blog. Thanks to this plugin, that’s no longer a concern.
The Google XML Sitemaps plugin basically crawls your entire website, which means that it can generate a sitemap making it easier for search engines to index your site. It’s fast, lightweight and an essential plugin for your SEO campaign.

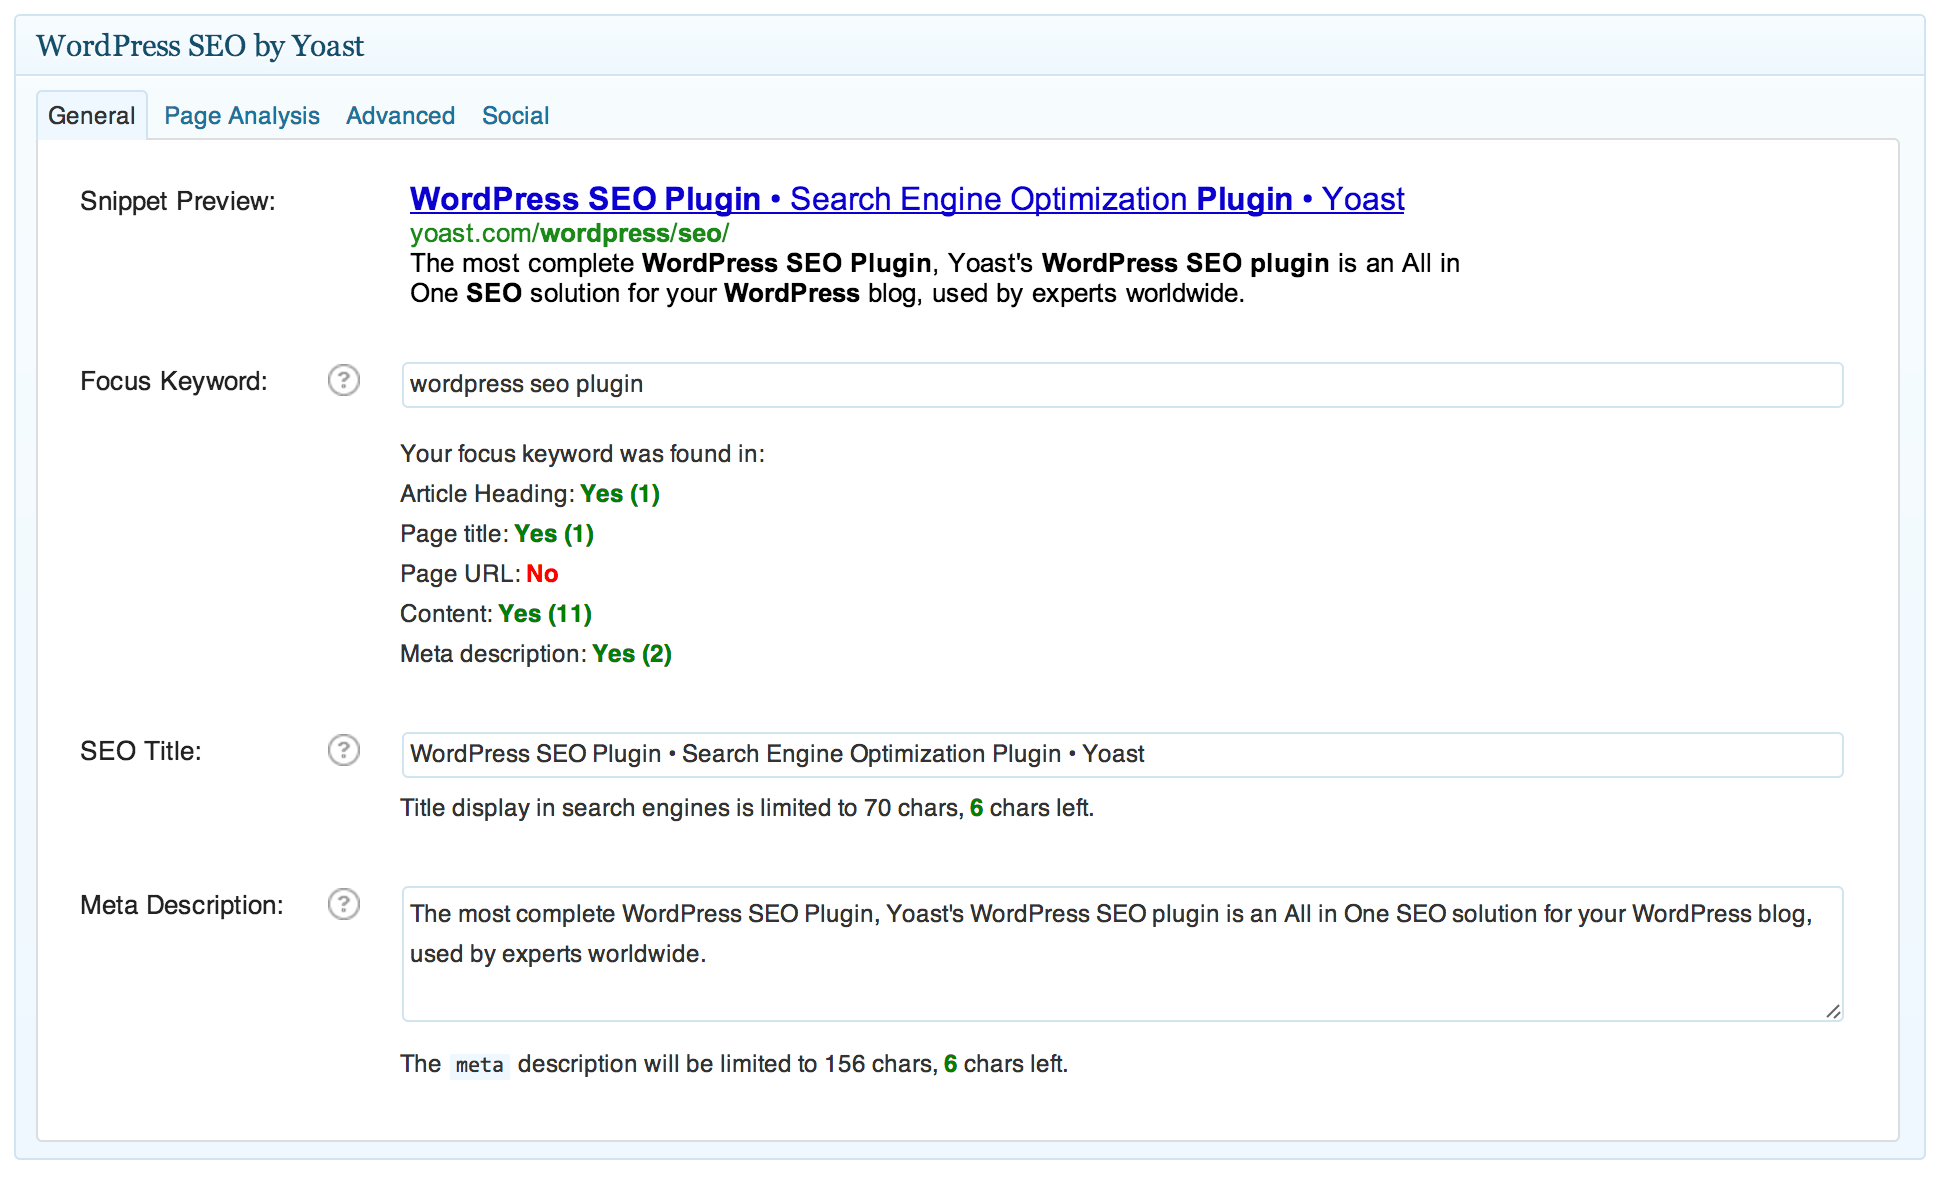
4. WordPress SEO by Yoast

screenshot-1(1)
Image Source: WordPress.org 5/28/2014
According to blogger extraordinaire Jeff Bullas, this is the top WordPress plugin you should be using, especially for your SEO efforts. Some of the incredible features on this popular, customer-favorite and must-have plugin include:
  • Premium Support
  • Page Analysis
  • Automatically Optimizes and Inserts Meta Tag and Link Elements
  • Advanced XML Sitemaps
  • RSS Optimization
  • Social Media Integration
  • Compatible with Multiple Sites
  • Can Improve Previous Plugins
  • Available in 24 Different Languages

5. Akismet

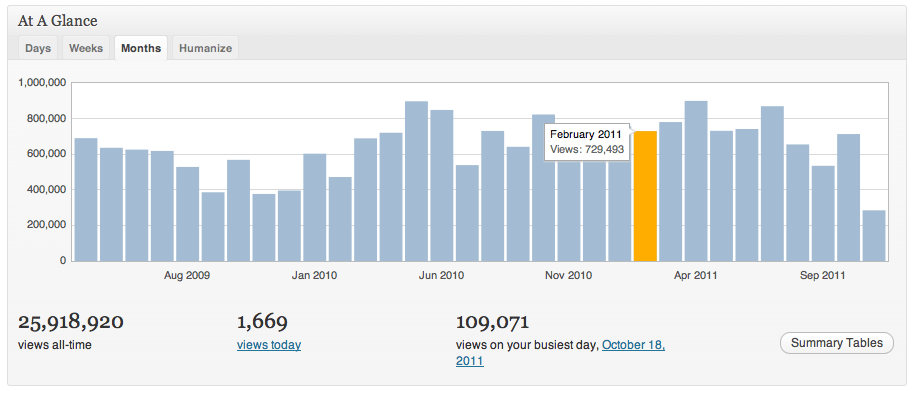
stats-at-a-glance2
Image Source: blog.akismet.com 5/28/2014
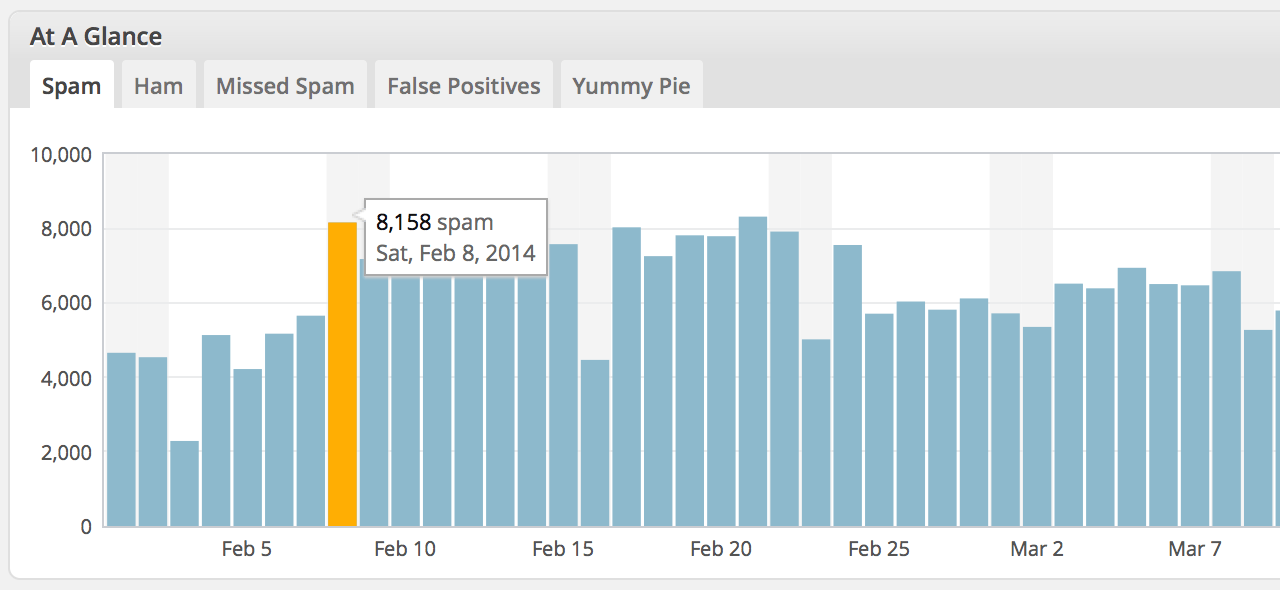
If you’re worried about possible spam being left in your comments, then Akismet is a plugin that you should definitely download. The plugin checks all of the comments left on your blog or website and determines if they are spam or not by running the comment through the Akismet web service. If it is spam, you will receive a notification.
So far, close to 21 million people have enjoyed the Akismet plugin and its features ranging from comment status history, highlighted links, having access to the number of approved comments and being able to view Spam and Unspam reports.

6. NextGEN Gallery

screenshot-1
Image Source: WordPress.org 5/28/2014
With over 10 million downloads this plugin isn’t just one of the most popular of all-time, it’s the most popular gallery plugin ever. On top of being incredibly easy to use, the NextGEN Gallery plugin features the following features:
  • Powerful Engine to Upload and Manage Images
  • Ability to Batch Upload
  • Import Meta Data
  • Ability to Edit Thumbnails
  • Can Quickly Add Watermarks
  • Group Galleries into Albums
  • Slideshow of Thumbnail Styles
  • Mobile Friendly

7. WooCommerce – excelling eCommerce

screenshot-1(2)
Image Source: WordPress.org 5/28/2014
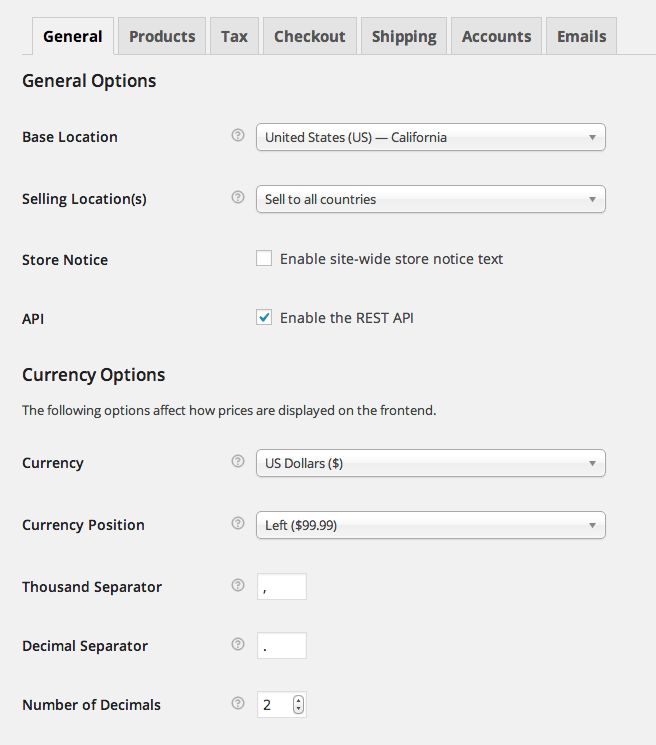
Looking to transition your website into an eCommorce store? Than here is another popular plugin that deserves your download. Why? Because it’s flexible and powerful plugin that contains the following:
  • Easily View Sales, Reviews, Stock Level, & Other Vital Statistics
  • Customizable Online Store Design
  • Access to Popular Payment Gateways and Shipping Methods
  • Wide Variety of Free and Premium Extensions

8. MailPoet Newsletters

screenshot-4
Image Source: WordPress.org 5/28/2014
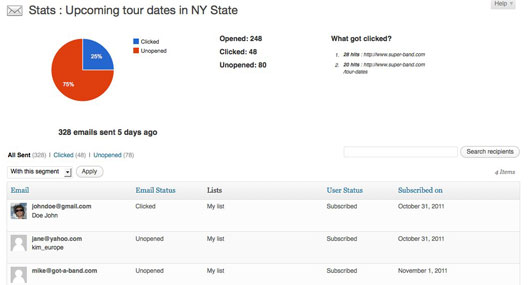
Newsletters are a major consideration when running a blog or website. So, wouldn’t it be convenient to have just one plugin where you can create newsletters, post notifications, and setup autoresponders? We thought so, too – which is why the MailPoet Newsletters plugin is a WordPress favorite.
Are here just several of the numerous features offered by this outstanding plugin:
  • Drag & Drop Newsletter Editor
  • Latest Posts Sent Automatically
  • 30 Different Themes to Chose From
  • Stats like Opens, Click, Unsubscribes
  • Newsletter Appears the Same in Gmail, iPhone, Android, Outlook, Yahoo, etc.
  • Import Subscribers in Two Steps
  • Available in 30 Languages

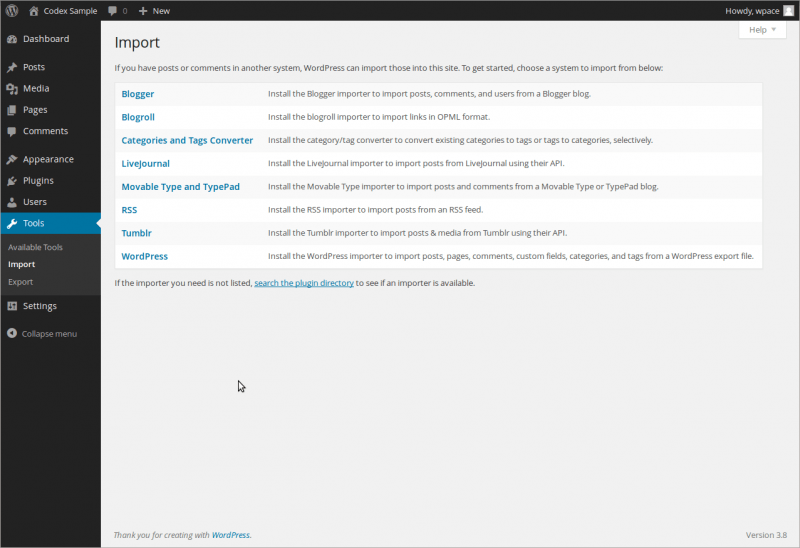
9. WordPress Importer


800px-manageimport
Image Source: codex.wordpress.org 5/28/2014
One rather big concern for WordPress users, or anyone who happens to have a website, is the possibility of having to migrate your site. Whatever the reasons for having to move all of you content over, it can be a stressful event that can leave you up at night by worrying how you’re going to import your posts, pages, comments, tags, custom fields and categories.
Thankfully, there’s a plugin that should put your mind to ease. The WordPress Importer has presumably saved the lives of 8 million plus WordPress users by giving them an importer that does the job, at least for most users. There may be some glitches with this plugin, but it seems to be effective enough because of its popularity.

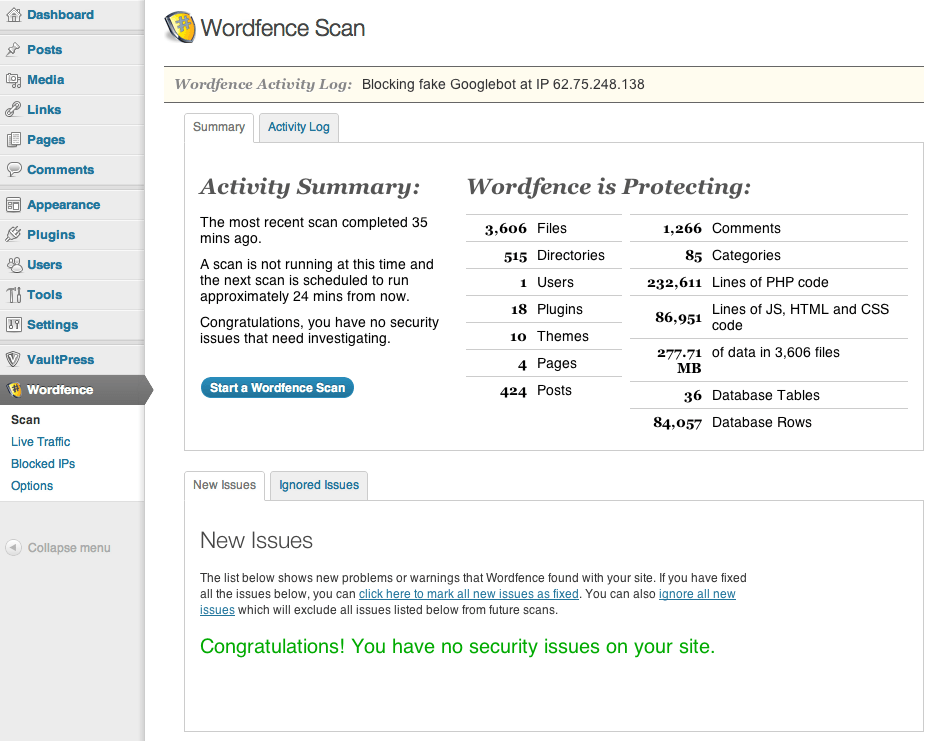
10. Wordfence Security

screenshot-1
Image Source: WordPress.org 5/28/2014
Two other concerns for WordPress users are the security and speed of their site. Thanks to the Wordfence Security plugin, those issues should be revolved. This free plugin offers a number of stellar features that will keep your site in tip-top shape. They include:
  • Falcon Engine, the fastest WordPress caching engine
  • Blocking of Known Attackers in Real-Time
  • Multi-Site Capable
  • Blocks Malicious Networks
  • Scans Core Files

Monday, 23 March 2015

Free Serial Keys, Activation Code for MalwareBytes AntiMalware Pro

So Here Is the Activation Code:


ID: 2XX86
Serial: 2864-FFBJ-4Y77-Q87B

ID: 7KJ94
Serial: 0AC2-JKBA-BTN9-48P8

Serial: 4CR59 Serial key: XACJ-HK4N-N7BQ-HHK6

User Name : 5XA52
Serial : P0DE-557A-ER1H-YCMP

User Name : 9UW48
Serial : LQ4U-R2YN-J151-A5BF

User Name : 7QN62
Serial : EBNF-4EFT-2PVD-84U4

User Name : 1KE85
Serial : T04T-RJ1U-H2X2-6FBL

User Name : 3FL75
Serial : QWME-8PFU-PURM-A2VY

User Name : 5IO49
Serial : D132-CK59-AL6B-VVBK

User Name : 6WS94
Serial : 523L-WYWN-5FC0-9R0X

User Name : 8OY47
Serial : 9JM1-85BG-4NG7-MKEX

User Name : 4PP34
Serial : DU6N-74PN-8QTK-0PL0

User Name : 5QA64
Serial : RX61-R6QM-1VQN-8U7U


ID=4QQ78
KEY=HC5L-7N1F-9CAX-RA15

ID=6KG69
KEY=BCKG-DR8A-C80H-F7RD

ID=8CQ12
KEY=P85L-YW1W-3WGE-7HLX

ID=2GD77
KEY=A7QR-V1Y2-PAJE-PM3E


ID: 6DB45
Serial:8256-Y11M-DTEQ-V4EB


ID:2KS55
Serial:5W1C-4UA3-GY67-C0XE


ID:5QI81
Serial:19BG-P6XN-E004-PLHV


ID:8WQ44
Serial:VWN8-GW2P-HXDV-NRJ9

ID:7UW81
Serial:V6MJ-MVCT-F6QD-F6Y4


ID:9BU21  
Serial:RXGP-9B5D-38EU-NPRX

ID:7BP98
Serial:RLEK-6GKJ-388Y-LMWA

ID:  6OF94
Key: HGUM-E1K9-HL2T-LCRD

ID: 6QA82
Key: C43A-5P9Q-UP6V-N12W

ID: 5BC74
Key: A82V-N7A6-05KW-JTY3

ID: 9VB42
Key: 9TGY-RF94-VTUE-YTP8

ID: 4OJ51
Key: GVK3-MX91-5H3P-qCP93

http://keydia.blogspot.in/

Wednesday, 18 March 2015

learn coding JavaScript joomla PHP

How to use random image in JavaScript

how to change image on reload/refresh website

 SLIDER CODE

learn code from here https://websmartdevelopment.wordpress.com/

<div id=”box”>
<a href=”#”> <img id=”image” /></a>
</div>
<script>
var images = [
“wp-content/themes/marketingcertified/image/owl-mascot.jpg”,
“wp-content/themes/marketingcertified/image/owl-mascot2.jpg”,
“wp-content/themes/marketingcertified/image/owl-mascot3.jpg”,
“wp-content/themes/marketingcertified/image/owl-mascot4.jpg”,
“wp-content/themes/marketingcertified/image/owl-mascot5.jpg”,
“wp-content/themes/marketingcertified/image/owl-mascot6.jpg”,
“wp-content/themes/marketingcertified/image/owl-mascot7.jpg”,
“wp-content/themes/marketingcertified/image/owl-mascot8.jpg”,
“wp-content/themes/marketingcertified/image/owl-mascot9.jpg”,
“wp-content/themes/marketingcertified/image/owl-mascot10.jpg”,
“wp-content/themes/marketingcertified/image/owl-mascot11.jpg”];
function randImg() {
var size = images.length
var x = Math.floor(size * Math.random())
document.getElementById(‘image’).src = images[x];
}
randImg();
</script>


how to upload image in folder and database in php


1 Vote

 Create table and connected from database 
<?php
$con = mysql_connect (“localhost”,”root”,””);
if (!$con)
{
die (‘Could not connect: ‘ . mysql_error());
}
mysql_select_db (“ratnesh”, $con);
$sql = “CREATE TABLE tbl_image
(
`id` INT( 50 ) NOT NULL AUTO_INCREMENT ,
`photo` VARCHAR( 50 ) NOT NULL ,
`status` INT( 50 ) NOT NULL ,
PRIMARY KEY ( `id` )
)”;
mysql_query($sql,$con);
mysql_close($con);
?>
 Upload  images in database and folder 
<?php
//Working on uplod image in database with folder
$con=mysql_connect( “localhost”,”root”,””);
mysql_select_db (“ratnesh”,$con);
if(isset($_POST [‘submit’]))
{
$file = $_FILES [‘file’];
$name = $file [‘name’];
$type = $file [‘type’];
$size = $file [‘size’];
$stored = $file [‘tmp_name’];
if(file_exists(“storimg/”.$_FILES[“file”][“name”]))
{
echo $_FILES[“file”][“name”] . “alredy exists. “;
}
else
//if($name!=””)
{
if(move_uploaded_file ($stored,’storimg/’.$name))//image is a folder in which you will save image
{
$query=”insert into tbl_image set photo=’$name'”;
mysql_query ($query) or die (‘could not updated:’.mysql_error());
echo “Your image upload successfully !!”;
}
}
}
?>
<html >
<head>
</head>
<body>
<form name=”form”  method=”post” enctype=”multipart/form-data”>
Photo <input type=”file” name=”file” />
<input type=”submit” name=”submit” value=”submit” />
</form>
</body>
</html>
Select images in tabla from database 
<?php
$con=mysql_connect (“localhost”,”root”,””);
mysql_select_db(“ratnesh”,$con);
$sql=”select * from tbl_image where id=’1′ and status=’0′”;
$query=mysql_query($sql);
while($row=mysql_fetch_array($query))
{
$image=$row [‘photo’];
?>
<img src=”img/<?php echo $image; ?>” width=”360″ height=”150″>
<?php
}
?>
Display images from database (display images with data in table )
<?php
$con=mysql_connect(“localhost”,”root”,””);
if(!$con)
{
die(‘could not connect:’ .mysql_error());
}
mysql_select_db(“ratnesh”,$con);
$result=mysql_query(“Select * from data “); ?>
<table border=’1′ width=’50%’ >
<tr>
<th>FirstName</th>
<th> LastName</th>
<th> Email</th>
<th> Password</th>
<th> Cpassword</th>
<th> Education</th>
<th>Phonumber</th>
<th>image</th>
</tr>
<?php
while ($row = mysql_fetch_array($result))
{
echo “<tr>”;
echo “<td>”.$row[‘FirstName’].”</td>”;
echo “<td>”.$row[‘LastName’].”</td>”;
echo “<td>”.$row[‘Email’].”</td>”;
echo “<td>”.$row[‘Password’].”</td>”;
echo “<td>”.$row[‘Cpassword’].”</td>”;
echo “<td>”.$row[‘Education’].”</td>”;
echo “<td>”.$row[‘Phonumber’].”</td>”;
echo “<td>”.$row[‘image’].”</td>”;
//display image and data in use  cmand show i tble
echo “<td><img width=’50px’ height=’50px’ src=’storimg/”.$row[‘image’].”‘></td>”;
//echo “<td>”.$row[‘image’].”width=’5px’ height=’5px'</td>”;
echo “</tr>”;
}
echo “</table>”;
mysql_close($con);
?>

How to create custom post in wordpress


1 Vote

Custom post types can easily be added to any theme by updating our functions.php file. If you haven’t played around with CPTs yet, I would encourage you to read  To create our CPT, let’s update our functions.php with the following:
// Custom Post types for Feature project on home page
add_action(‘init’, ‘create_feature’);
function create_feature() {
$feature_args = array(
‘labels’ => array(
‘name’ => __( ‘Feature Project’ ),
‘singular_name’ => __( ‘Feature Project’ ),
‘add_new’ => __( ‘Add New Feature Project’ ),
‘add_new_item’ => __( ‘Add New Feature Project’ ),
‘edit_item’ => __( ‘Edit Feature Project’ ),
‘new_item’ => __( ‘Add New Feature Project’ ),
‘view_item’ => __( ‘View Feature Project’ ),
‘search_items’ => __( ‘Search Feature Project’ ),
‘not_found’ => __( ‘No feature project found’ ),
‘not_found_in_trash’ => __( ‘No feature project found in trash’ )
),
‘public’ => true,
‘show_ui’ => true,
‘capability_type’ => ‘post’,
‘hierarchical’ => false,
‘rewrite’ => true,
‘menu_position’ => 20,
‘supports’ => array(‘title’, ‘editor’, ‘thumbnail’)
);
register_post_type(‘feature’,$feature_args);
}
add_filter(“manage_feature_edit_columns”, “feature_edit_columns”);
function feature_edit_columns($feature_columns){
$feature_columns = array(
“cb” => “<input type=\”checkbox\” />”,
“title” => “Title”,
);
return $feature_columns;
}
//Add Meta Boxes
add_action( ‘add_meta_boxes’, ‘cd_meta_box_add’ );
function cd_meta_box_add()
{
add_meta_box( ‘my-meta-box-id’, ‘Link to Project’, ‘cd_meta_box_cb’, ‘feature’, ‘normal’, ‘high’ );
}
function cd_meta_box_cb( $post )
{
$url = get_post_meta($post->ID, ‘url’, true);
wp_nonce_field( ‘my_meta_box_nonce’, ‘meta_box_nonce’ ); ?>
<p>
<label for=”url”>Project url</label>
<input type=”text” name=”url” id=”url” value=”<?php echo $url; ?>” style=”width:350px” />
</p>
<?php
}
add_action( ‘save_post’, ‘cd_meta_box_save’ );
function cd_meta_box_save( $post_id )
{
// Bail if we’re doing an auto save
if( defined( ‘DOING_AUTOSAVE’ ) && DOING_AUTOSAVE ) return;
// if our nonce isn’t there, or we can’t verify it, bail
if( !isset( $_POST[‘meta_box_nonce’] ) || !wp_verify_nonce( $_POST[‘meta_box_nonce’], ‘my_meta_box_nonce’ ) ) return;
// if our current user can’t edit this post, bail
if( !current_user_can( ‘edit_post’ ) ) return;
// now we can actually save the data
$allowed = array(
‘a’ => array( // on allow a tags
‘href’ => array() // and those anchors can only have href attribute
)
);
// Probably a good idea to make sure your data is set
if( isset( $_POST[‘url’] ) )
update_post_meta( $post_id, ‘url’, wp_kses( $_POST[‘url’], $allowed ) );
}

2 Next, we need to pull the content out and display it. For the purpose of this demo, I’ve created a front-page.php which as the title says, I’m using on my home page.
In order to display the content, I’ll use the WP_query function inside like so:
<section id=”featured-slider”>
<div id=”slides”>
<div class=”slides_container”>
<?php
$loop = new WP_Query(array(‘post_type’ => ‘feature’, ‘posts_per_page’ => -1, ‘orderby’=> ‘ASC’));
?>
<?php while ( $loop->have_posts() ) : $loop->the_post(); ?>
<div class=”slide”>
<?php $url = get_post_meta($post->ID, “url”, true);
if($url!=”) {
echo ‘<a href=”‘.$url.'”>';
echo the_post_thumbnail(‘full’);
echo ‘</a>';
} else {
echo the_post_thumbnail(‘full’);
} ?>
<div class=”caption”>
<h5><?php the_title(); ?></h5>
<?php the_content();?>
</div>
</div>
<?php endwhile; ?>
<?php wp_reset_query(); ?>


jquery


1 Vote

How to change image on mouse over
<script type=”text/javascript” src=”http://code.jquery.com/jquery-1.8.2.js”></script&gt;
<script type=”text/javascript”>
$(function() {
$(“#imgdetails”).hover(function() {
$(this).attr(“src”, “http://d3l2031tfshpe7.cloudfront.net/Images/Product/DRS00420A/2.jpg&#8221;);
}, function() {
$(this).attr(“src”, “http://d3l2031tfshpe7.cloudfront.net/Images/Product/DRS00420A/1.jpg&#8221;);
});
})
$(function() {
$(“#img”).hover(function() {
$(this).attr(“src”, “http://localhost/marketingcertifiednew/wp-content/uploads/2014/11/marketing-certified-home59ro.jpg&#8221;);
}, function() {
$(this).attr(“src”, “http://localhost/marketingcertifiednew/wp-content/uploads/2014/09/marketing-certified-home59.jpg&#8221;);
});
})
</script>

2 How to change image on mouse over
<span class=”test” style=”float: left; margin-top: -10px;”;>
<a href=”#s-pricing” onmouseover=”document.getElementById(‘myimage1′).src=’wp-content/uploads/2014/11/marketing-certified-home59ro.jpg';”
onmouseout=”document.getElementById(‘myimage1′).src=’wp-content/uploads/2014/09/marketing-certified-home59.jpg';”>
<img width=”171″ height=”45″ src=”wp-content/uploads/2014/09/marketing-certified-home59.jpg” id=”myimage1″ /></a></span>

How to use random image in JavaScript
how to change image on reload/refresh website
<div id=”box”>
<a href=”#”> <img id=”image” /></a>
</div>
<script>
var images = [
“wp-content/themes/marketingcertified/image/owl-mascot.jpg”,
“wp-content/themes/marketingcertified/image/owl-mascot2.jpg”,
“wp-content/themes/marketingcertified/image/owl-mascot3.jpg”,
“wp-content/themes/marketingcertified/image/owl-mascot4.jpg”,
“wp-content/themes/marketingcertified/image/owl-mascot5.jpg”,
“wp-content/themes/marketingcertified/image/owl-mascot6.jpg”,
“wp-content/themes/marketingcertified/image/owl-mascot7.jpg”,
“wp-content/themes/marketingcertified/image/owl-mascot8.jpg”,
“wp-content/themes/marketingcertified/image/owl-mascot9.jpg”,
“wp-content/themes/marketingcertified/image/owl-mascot10.jpg”,
“wp-content/themes/marketingcertified/image/owl-mascot11.jpg”];
function randImg() {
var size = images.length
var x = Math.floor(size * Math.random())
document.getElementById(‘image’).src = images[x];
}
randImg();
</script>

how to show a form in popup by jquery

<html>
<head>
<title>LIGHTBOX EXAMPLE</title>
<style>
.black_overlay{
display: none;
position: absolute;
top: 0%;
left: 0%;
width: 100%;
height: 100%;
background-color: black;
z-index:1001;
-moz-opacity: 0.8;
opacity:.80;
filter: alpha(opacity=80);
}
.white_content {
display: none;
position: absolute;
top: 25%;
left: 25%;
width: 50%;
height: 50%;
padding: 16px;
border: 16px solid orange;
background-color: white;
z-index:1002;
overflow: auto;
}
</style>
</head>
<body>
<p>This is the main content. To display a lightbox click <a href = “javascript:void(0)” onclick = “document.getElementById(‘light’).style.display=’block';document.getElementById(‘fade’).style.display=’block'”>here</a></p>
<div id=”light” class=”white_content”>This is the lightbox content. <a href = “javascript:void(0)” onclick = “document.getElementById(‘light’).style.display=’none';document.getElementById(‘fade’).style.display=’none'”>Close</a></div>
<div id=”fade” class=”black_overlay”></div>
</body>


Tuesday, 17 March 2015

How WordPress Can Leverage Businesses With Effective CRM Solution

Are CRM Solutions Offered By WordPress Ideal For You?

WordPress is an amazing platform that offers truckloads of features to its users. The best thing about it is that you can integrate almost any kind of available function in your WP site by simply installing the appropriate plugin from its hefty directory.
Whether you want to manage your communications with ease, or you want to handle your customer relationship with high proficiency, you can get a list suitable plugin options for that. Now, the most important thing is to decide that will these plugins offer a viable solution or the existing services like Salesforce is a better option. To make the best choice, it is advisable to consider the merits and demerits of all the options and streamline your choice while keeping your site’s prime goal in the mind.
If that comparison has encouraged you to choose the WordPress as the best CRM solution, here is a list of few CRMs that can be integrated into the WP sites.

1. WP-CRM
WP CRM
This plugin further improves the existing WordPress features to facilitate the site owners to conveniently maintain the relationship with their site visitors and readers. You can manage the searches via a filter, maintain the sign up in an organized fashion by using the custom attributes, and a lot more.
You can also reap the benefits of the basic functionalities of a CRM service by activating this plugin in your WP install. Whether you want insert a new user info or want to edit the existing details, you can easily manage every bit of it. It represents the data in the dynamic chart format that makes the things more clear and simple. Moreover, you can track the notes and activities of your users.
2. WordPress-to-lead for Salesforce CRM
Salesforce CRM
Create a reliable and secure integration between your Salesforce CRM account and your website by using this excellent plugin. It allows people visiting your site to fill the contact form, and the details directly move into the Salesforce Customer Relationship Management. Thus, there is no need to copy and paste the lead info and it thereby remove the chances of missing leads.
3. WooCommerce Customer Relationship Manager
WooCommerce CRM
This premium plugin is the best value for money, it is available at an affordable price. With this plugin, you can extend the existing customer features of WooCommerce. It thus helps handle the active relationships and manage the sales easily.
It helps maintain a log of calls and emails made by customers on your WP site. Whether you want to send bulk emails to your customers for promoting your products or want to send an email to a particular customer, the WooCommerce Customer Relationship Manager plugin is a great choice. There are a few of the features of this resourceful plugins, there are a lot more.
4. WP Highrise
Create a desired form by using this plugin on your WP site and drop it on any of your web page or post. When this form is filled by any of your visitors, thereafter you will be getting notified via a suitable email. The same info regarding the new visitor’s detail is also forwarded to your Highrise account.
This allows you to easily manage all the records that hold the contact and other details of your website visitors via your site itself. Install any of the aforementioned plugin in your WordPress site and conveniently benefit your business with a consummate CRM solution. However, it is recommended to research and invest some time and efforts to streamline the search.
Easy ways to get Adsense account approval without having a website - See more at: http://moneytariff.blogspot.in/2012/06/easy-ways-to-get-adsense-account.html#sthash.TstMOh8p.dpuf

Easy ways to get Adsense account approval without having a website - See more at: http://moneytariff.blogspot.in/2012/06/easy-ways-to-get-adsense-account.html#sthash.TstMOh8p.dpuf
 Easy ways to get Adsense account approval without having a website


Here, Moneytariff presents how to open “Google Adsene” Account without having a website. By our way of methods implementation you can own “Adsense Account” within hours successfully.
So many of websites are offer you about “How to get an instant Google Adsense Account” by paying them some initial amounts. These are all the methods of implementation to sell Adsense accounts online, here we going to teach you those methods how to get instant Google Adsense account on other platform websites. There are 7 types of methods to create Adsense account without any paying even single penny.
Lets’ start the tutorial
Platform number one : Blogger.com
Blogger is one of the free blogging service platforms from Google to create subdomain blog/website with extension of “yourname.blogspot.com”. You can upload free images,videos and share content based articles by creating a blog. You can get free customization blogger templates with all the Google services with a single gmail account.
You can apply for Google Adsense  via Blogger.com under Monetization tab.
Create Blogger account: BLOGGER
Platform number two: Docstoc

With the help of Docstoc you can create easily an Google adsense account. By creating account on this platform you can upload files, images, presentation and more. Documentation type files are accepted. To Adsense account on this platform.
Create Account on: Dcostoc
Platform number three:Indyarocks
This is a Facebook alternative website, where you can share images, status updates, community based website. With your genuine email ID create an account on this platform. After successful creation of account write some articles or share few articles at least more than six posts, then go to apply for Google Adsense account.
Create Account on: Indyarocks
Platform number Four: Hubpages
Hubpages.com is wonderful platform and most popular website. Plentiful blogger are using this platform for creating Google Adsense account. By sharing good articles with hubpages makes you create account, but this platform is a revenue sharing website.
Create Account on: Hubpages
Platform number Five: Flixya
Here you’ve quite chances to create Adsense account by using this platform. Flixya.com is powered by Google Adsense itself, on sharing videos and pictures. Very easiest signup process makes you to create an account:
Create Account on: Flixya
Platform number Six: Bloggerparty
Another type of revenue sharing website called Bloggerparty.com. All you’ve do is just share your views or articles on this platform with simple way of signup process. By applying google Adsense you can get easy approval.
Create Account on: Bloggerparty
Platform number Five:Webanswers
This platform is just alternative to Yahoo Answers. The members on this platforms asks you few question relating to various topics, you can just make them doubt clarify how many of solution finder makes you very easily get approval form Google Adsense itself.
Create Account on :
WebAnswers

http://moneytariff.blogspot.in/2012/06/how-to-earn-by-uploading-files-online.html 

http://moneytariff.blogspot.in/search/label/How%20to%20earn%20online?max-results=10 

http://www.blogtariff.com/2014/08/earn-online-with-google-adsense-ads-on.html 

      It’s necessary to display blogger desktop template on Mobile device? 

 http://www.bestpaidonlinesurveysites.com/top-10-best-paid-online-survey-sites-for-referrals/

site:blogspot.com fast and genuine way to earn online with affiliate and referral 

Friday, 13 March 2015

starting a business road-map-of-becoming-an-entrepreneurship

ट्वीट से 3 करोड़ रुपए कमाता है ये शख्स, ब्रिटनी स्पीयर्स को करता है फॉलो

Affiliate

lead -sign up

 ads

क्रिस सैनचेज 23 साल के हैं। उनकी सालाना कमाई 3.10 करोड़ रुपए (करीब 5 लाख डॉलर) है। दिलचस्प बात ये है कि क्रिस की यह कमाई ट्वीट्स के जरिए होती है। साल 2009 में क्रिस ने पॉप सिंगर ब्रिटनी स्पीयर्स को फॉलो करने के लिए ट्विटर अकाउंट बनाया था। आज क्रिस को कई सेलिब्रिटी फॉलो करती हैं। क्रिस उबर फैक्ट्स नाम से अकाउंट चलाते हैं। इसमें दिलचस्प फैक्ट्स (तथ्य) पोस्ट किए जाते हैं।
दुनिया में 95 लाख से ज्यादा फॉलोअर्स
दो साल तक क्रिस ने कई सेक्टरों के दिलचस्प फैक्ट्स जमा किए। 2011 में उबर फैक्ट्स अकाउंट लॉन्च किया। पेरिस हिल्टन, मिली साइरस, किम कार्दशियन जैसी हस्तियों समेत दुनियाभर में 95 लाख से ज्यादा लोग इसे फॉलो करते हैं। उबर फैक्ट्स टीम में तीन लोग हैं। सभी बारी-बारी से 24 घंटे फैक्ट्स ढूंढते और पोस्ट करते हैं। हर हफ्ते करीब 37 से 50 हजार रु.(600 से 800 डॉलर) की कमाई फैक्ट्स गैलरी और अकाउंट पर शेयर हुए दूसरे लिंक्स से होती है। उबर फैक्ट्स की ऐप भी है। जिससे हफ्ते में 37 लाख रु. (60 हजार डॉलर) कमाई होती है।

 https://www.google.co.in/search?q=uber+fracts


https://www.youtube.com/watch?v=qQ9xVIdWRU0

Affiliate email marketing give 100% return.

idea :choose cpa and link to yahoo answer.


Get Paid To’ sites

swagbucksSimilar to making money from online surveys, GPT sites reward you in cash and vouchers for completing various offers or activities online.
The most popular sites today are, Swagbucks.com, InboxPounds and PaidOffers. Toluna
Exciting update! We’ll soon be launching our own GPT service for our readers. Invites will be limited and UK only, please join our mailing list if you’re interested in hearing once it’s live:

ocial Investment Networks

The historically hard-to-break world of investing in stock markets and currencies has been cracked wide open. Today there is no need to be a fat cat or fund the yachts of Wolf of Wall Street style stock brokers. You can do it all yourself with the help of free online market trading platforms.
Having spent many hours researching this new opportunity, I’ve been experimenting with eToro.com which has over 4 million users worldwide. It was recently featured in the BBC 2 documentary “Traders: Millions by the Minute” and the Financial Times.
etoro trading

  1. No-risk matched betting

    free bets from matched bettingHands down the quickest way to make a lot of money (well, without breaking the law). Lots of students have genuinely made £100s from this technique. It’s completely legal, risk free, tax free, and anyone can do it.
    It works by taking advantage of free bets regularly offered by betting sites through ‘matching’ them at a betting exchange. Matched betting eliminates the risk (you are betting both for and against a certain outcome).
    This leaves you being able to squeeze out the free bet, which can be as much as £200! Multiply this by how many betting sites there are and you can quite easily come away with a profit of a few hundred pounds.
    Owen walks you through how to make your first £15 profit (using a real life example) in this gem of a guide to matched betting. If you know of any better way to make £30/hr sitting at home, please let us know!
  2. Online surveys

    cat typingCredit: Julio Marquez – Flickr.com
    An increasingly popular way for students to make money is to fill out online surveys in their spare time. Research companies are always recruiting new members to answer surveys and test new products.
    For a few minutes of form filling, you can make a couple of quid which is paid as cash or in rewards. You can make up to £3 for some surveys!
    A few good ones to try are: Toluna, Vivatic, MySurvey, YouGov, SurveyBods, Valued Opinions, The Opinion Panel, iPoll, Global Test Market, Hiving, PanelBase, Harris Poll, Opinion Outpost, Yourword, Pinecone, IPSOS, New Vista.
    Also sign up for Swagbucks.com which rewards you for surveys as well as simply surfing the web, watching videos and playing games.
    Update: See our new full guide to the best paid online surveys!


    Finding a supplier

    Google “(Your product) + wholesale” and combinations similar to find a supplier who will sell to you at wholesale prices. I know some people run small ebay businesses by finding clearance items at retail stores and reselling them on Ebay, but your profit margins will probably be smaller than if you bought them wholesale.
    Most suppliers are going to want to make sure you are legitimately interested in becoming a dealer for their products, rather than just trying to get a deal for yourself. This process is probably going to be slightly different for different products. For me, I found some suppliers on Google and I asked a friend who he used.

    Sell products in forums, bulletin boards, classifieds and other community type sites

    Sell products from your own website

    You can sell product from your own website store, via community sites and classifieds (like Craigslist) and of course eBay and collectively make good money.  

    Paid reviews

    For a brief period on my blog I invited people to submit their product, service or website for a paid review. This means they pay a fee (for my site it was $250) and I would write an article about whatever they submitted. I would not accept just anything for review, I had to see an angle that made for relevant content for my audience. Nor was a paid review a promise that I would write positively about the subject – I would highlight both good and bad points.

    Affiliate marketing

    As my blog audience grew I began to test a method of making money I was very interested in – affiliate marketing. My first test proved positive, though initially I was disappointed that of my readership of 500 or so people (at the time), I could only sell one or two products, making $20 commission each. It wasn’t retirement money, but it was a start.
    Affiliate income has gone on to become my second highest source of income in recent years, thanks in part to the increase in my audience reach. By combining my blog and email newsletter I can reach thousands of people with just one piece of content. By testing different products and recommending things I personally use myself, I’ve been able to earn as much as $50,000 in commissions selling just one product.
    Affiliate marketing is possibly the single best way to make a living online because it is so hands off, can be automated easily enough and can deliver some incredible profit margins. It’s especially good when you can use affiliate marketing to recommend things in areas you are personally interested in – for example you can make money simply writing a review of a book you really wanted to read anyway and you get paid for doing what you love.
    The challenge for you is figuring out what market(s) to enter, building an audience and maintaining relationships with your readers so they trust what you tell them. If you know something that other people want to know and you are prepared to share that information, you could be looking at a fairly lucrative affiliate opportunity.
    Affilliate/Reseller
    For those who have the knack of selling, one of the best ways to make money online is to become an affiliate/reseller. An affiliate is a person who gets a commission for selling every product that he promotes, whether on his Website or through any other avenue such as eBay. You don't have to own the product. You only need to sign up for an affiliate program with a company and start selling its products under your referral link. Firms such as Commission Junction or Click Bank have a large pool of products.

    Inbound call centre
    Many companies, who are facing space constraints, especially those in metro cities, prefer to hire workers outside their offices or outsource certain processes. You can set up an inbound call centre at home to handle such jobs. Research different companies that are outsourcing their work as they may have opportunities for inbound call centre agents. You can work for more than one company. This can be either a part-time or fulltime engagement, depending on your need.


 A couple months ago I decided to put another idea I had into action and see how much money I could make with the least amount of effort and also keeping the budget to $0 or at least really low. My method was to find at least 1 or 2 affiliate programs that paid me per lead instead of per sale and then use free ways to advertise it. I thought about this when I realized that its pretty easy to get free sign ups but much harder to turn an opt-in into a sale so naturally I thought it would be better to offer a program that would pay you a reasonable amount for just getting the sign up. Once I found that, I just wrote a few ads and started advertising them. (im talking about real affiliate programs and not just typical cpa offers)


Here's my technique...

1. I Signed up for an offer that is pay per lead ( pays you per free sign up ). You can find others but this is the main one I use. They give you a few capture pages to choose from but its always best if you can create your own unique one as long as you know what works best at getting conversions.


NON Aff Link

2. I Signed up for a 2nd PPL offer that I would then send the people that opted in to my list through the autoresponder from the first PPL offer.


NON Aff Link

You will need a getresponse account to capture all your leads that you get so you can make even more money by sending them offers in the future. You also need one if you use the main ppl offer that I do since that's the only way they pay per lead. I like this anyway so I can keep the leads for myself. If you don't want to use getresponse just use the 2nd ppl offer that I listed or any others you like.

3. Join some top safelists and submit an ad for the PPL program. I used the 10kchallenge website to sign up with different safelists because they list all known codes to get free credits.

4. Join some top traffic exchanges and submit your ad or link

5. If you have a good offer as AAX is, you can also use special exchange websites that offer youtube views, and facebook likes as long as they have an option to also receive website views. With these sites I just do whats easy and offers the most credits which is usually liking a yt video or following someone on fb. I then use the credits to get views for my offer or capture page. With a great free offer the conversions are actually really good.

6. Now that your seeing sign ups coming in and you know this works you can now start to do some paid advertising. If you don't want to risk any of your own money now, just wait until your first commission payment and use some of that money to put back into advertising. I upraded some of my accounts of the top safelists so I could send more offers per day. I also started to invest in some cheap ppc and ppv sites which seem to work great with this offer. So far ppc seems to have worked the best for me.


How Do I Earn Money?https://help.disqus.com/customer/portal/articles/666278-introducing-promoted-discovery-and-f-a-q-

Can I earn money via Discovery?

Yes. The Discovery box generates additional revenue for publishers in two distinct ways because it is comprised of two core components: Internal Discovery and Promoted Discovery.
Internal Discovery makes content recommendations specific to the site your users are on. Internal Discovery leads to increased page views and therefore more opportunities to generate advertising revenues.

Promoted Discovery points users to content that marketers are looking to promote to your audience. As a publisher, you earn a revenue share from Disqus for each click on a promoted content link. Our advertiser partners pay us to distribute this content in relevant places. Disqus has strict content guidelines to make sure we only select high quality stories that are interesting and well written.


योजना तैयार करें
=> किसी एक को चुनें-
> बूटस्ट्रैपिंग
> एंजलफंडिंग
> वी सी फंडिंग
> लोन फाइनेंसिंग
=> रिसर्च और डेवलपमेंट में निवेश करें।
=> प्रारंभिक संचालन शुरू करें।
=> लॉन्च की रणनीति तैयार करें।
=> ब्रेक इवन प्वाइंट पर नजर रखें।
=> निवेश बढ़ाएं और विस्तार करें।
रणनीति बनाएं
=> ट्रेनिंग की प्रक्रिया प्लान करें।
=> प्रोजेक्ट के लक्ष्य तय करें।
=> टाइमलाइन निर्धारित करें।
=> बिजनेस के आंकड़ों को जानिए।
=> लागत का आंकलन करें।
=> बिक्री का लक्ष्य बनाएं।
=> स्टार्टअप के खर्चों की सूची बनाएं।
=> अनुमानित फाइनेंशियल स्टेटमेंट बनाएं।
=> चेक कीजिए क्या सब ठीक है?
=> अगर नहीं तो फिर से शुरू करें।
=> सब को मिला कर ठोस बिजनेस प्लान बनाएं।
=> कुशल टीम तैयार कीजिए।
=> फंडिंग के बारे में सोचिए।
विश्लेषण करें
=> वेंचर का यूएसपी तय करें।
=> मार्केट रिसर्च से ग्राहक की पसंद जानें।
=> इंडस्ट्री की बेहतरीन प्रैक्टिस सीखें।
=> प्रतिस्पर्धी और उसके बिजनेस के बारे में जानिए।
=> स्वॉट एनालिसिस से बाजार की मुश्किलों को पहचानिए।
=> क्या आपका वेंचर व्यावहारिक है?
=> अगर नहीं तो फिर से शुरू कीजिए।
=> ग्राहकों का वर्गीकरण कीजिए।
=> अपने बाजार की पहचान कीजिए।
=> उत्पाद को प्रस्तुत कीजिए।
=> ग्राहक तक पहुंचने की रणनीति तय कीजिए।
=> बाजार में उतरने की योजना बनाएं।
=> बिजनेस प्रणाली तैयार करें।
=> हायरिंग की प्लानिंग करें।
=> नियुक्ति का तरीका तय करें।

आप भी कमा सकते हैं मोटा मुनाफा, सिर्फ 4 स्टेप्स दूर है शेयर बाजार

moneybhaskar.com | Nov 23, 2014, 12:40PM IST

1 of 7
 शेयर बाजार आए दिन इतिहास रच रहा है। ऐसे में हर किसी के मन में यह बात जरूर आती है कि वह भी शेयर बाजार में पैसे लगाए, लेकिन इसके लिए सही शेयर में पैसे लगाना भी जरूरी होता है, ताकि अधिक से अधिक फायदा कमाया जा सके।
शेयर बाजार में निवेश करने के लिए आपको सबसे पहले डीमेट अकाउंट खुलवाना होता है। आज मनी भास्कर आपको बता रहा है कि कैसे आप सिर्फ इन 4 स्टेप्स को फॉलो करके डीमेट अकाउंट खुलवा सकते हैं। आइए जानते हैं इन 4 स्टेप्स के बारे में-
स्टेप-1- ऑनलाइन ट्रेडिंग के लिए डीमेट अकाउंट खुलवाना सबसे पहला स्टेप होता है। इसके लिए आपको किसी ऐसी कंपनी या संस्थान में अकाउंट खुलवाना होगा, जो ऑनलाइन ट्रेडिंग की सुविधा देते हैं। आज कल बहुत सारे बैंक भी डीमैट अकाउंट की सुविधा देने लगे हैं। इसके लिए आप सीधे शेयर खान से भी जुड़ सकते हैं।
स्टेप-2- डीमैट अकाउंट खुलवाते समय आपको कुछ दस्तावेज भी जमा करने होते हैं। आपको अकाउंट खुलवाते समय पहचान पत्र, जन्म तिथि प्रमाण पत्र, निवास प्रमाण पत्र, पैन कार्ड, पासपोर्ट, फोटो आदि की जरूरत होती है।
स्टेप-3- डीमैट अकाउंट खुलवाते समय आपको एक एग्रीमेंट भी साइन करना होता है। इस एग्रीमेंट में मिलने वाली सुविधाओं और शर्तों के बारे में लिखा होता है।
स्टेप-4- सारी औपचारिकताएं पूरी होने के बाद आपका अकाउंट खोल दिया जाता है। इसके बाद आपको कंपनी की तरफ से बेनिफिशियल ऑनर आइडेंटिफिकेशन नंबर दे दिया जाता है। इसी नंबर से आप ऑनलाइन ट्रेडिंग करते हैं।
कस्टोडियन फीस
कंपनी इसे हर महीने ले सकती है या फिर एक मुश्त। यह फीस आपके शेयरों की संख्या पर निर्भर करता है।
ट्रांजैक्शन फीस
डीपी चाहे तो इसे हर ट्रांजेक्शन पर चार्ज कर सकती है या फिर चाहे तो ट्रेडिंग की राशि पर (न्यूनतम फीस तय कर)।
इनके अलावा कंपनी री-मैट, डी-मैट, प्लेज चार्जेज, फील्ड इंस्ट्रक्शन चार्जेज आदि भी वसूल सकती हैं।
 

--

How I made 15,000.00 In 1 Month Just By Tweeting

ad.ly
and Sponsored Tweets:

 http://www.shoemoney.com/

http://www.directcpv.com/affiliates-cpv-revshare-make-money-get-paid-software-application-pop-up-pop-under-interstitial-ads-affiliate-program.html 

http://www.my4hrworkweek.com/142-ways-to-make-money-online/ 


Wednesday, 11 March 2015

The import android.support.v7 cannot be resolved & ActionBarActivity cannot be resolved to a type


  1. Go to your project in the navigator, right click on properties.
  2. Go to the Java Build Path tab on the left.
  3. Go to the libraries tab on top.
  4. Click add external jars.
  5. Go to your ADT Bundle folder, go to sdk/extras/android/support/v7/appcompat/libs.
  6. Select the file android-support-v7-appcompat.jar
  7. Go to order and export and check the box next to your new jar.
  8. Click ok.


After you add appcompat_v7 to your dependencies, be sure that the libs folder from your project are empty. By default, an android-support-v4.jar is created when you define your project, so this will cause conflict when you declare appcompat_v7 library as your dependency.
So, the first thing you need to do is check the folder .../My_Project/libs and fearlessly delete the file android-support-v4.jar.
Then, add the appcompat_v7 library as a dependency of your project: To do this, if you are using Eclipse:
  1. Right click in your project folder, located in the Navigator.
  2. Click in properties, in the final of the list.
  3. In the Properties window, select the Android option (left menu).
  4. In the box Library, add your new reference.

    <style name="AppBaseTheme" parent="Theme.AppCompat.Light"> error

Fixing Error in styles.xml to generate R.java : No resource found name 'Theme.AppCompat.Light' 

You are trying to use Theme.AppCompat.Light theme which is a library project. You have to reference this library project to your project.
Now, at first, check that you have installed this library project as follows...
Go Window-->Android SDK Manager then a window named Android SDK Manager will appear as below.
enter image description here
If the Android Support Library is not installed then install it. You can see more information about Android Support Library setup from the below Android Developer site.
Support Library Setup
After Android Support Library setup completion, reference the library to your project from this path...
android-sdk/extras/android/support/v7/appcompat
To reference, follow these steps:
  1. File->Import (android-sdk\extras\android\support\v7). Choose "appcompat"
  2. Project-> properties->Android. In the section library "Add" and choose "appCompat"
  3. 2nd step is VERY IMPORTANT
Now, clean and build your project and run it. I think after all of these, your problem will be solved.

Tuesday, 10 March 2015

how to make a Bootable copy of your Windows 7 DVD Disk (using power iso)

Activation :
Name : Mahodi
Serial : G8LBJ-FTUG1-3CPMS-2FYYC-1FZJI of your Windows 7 DVD Disk (using power iso)


  • Click on the "Save" button on toolbar, or click on the "File > Save As..." menu.
  • Choose the menu "Action > Boot > Add Boot Information" to load a bootable image file.
  • Save the iso file to "Standard ISO Images (*.iso)" format.
  • To make bootable CD, please burn the iso file to a blank CD / DVD disc.
     
power iso bootable usb

how-to-make-win7-bootable-usb-drive

  1. Choose the menu "Tools > Create Bootable USB Drive". The "Create Bootable USB Drive" dialog will popup. If you are using Windows Vista or Windows 7 / 8 operating system, you need confirm the UAC dialog to continue.
  2. In "Create Bootable USB Drive" dialog, click "..." button to open the iso file of Windows 7 or Windows 8.
  3. Select the correct USB drive from the "Destination USB Drive" list if multiple USB drives are connected to the computer.
  4. Choose the proper writing method. "USB-HDD" is recommended.
  5. Click "Start" button to start creating windows 7 / 8 bootable USB drive.