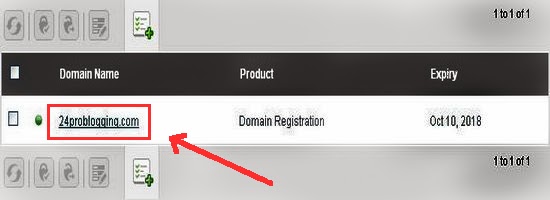
Step-1- Login in your BigRock Account and select your domain.
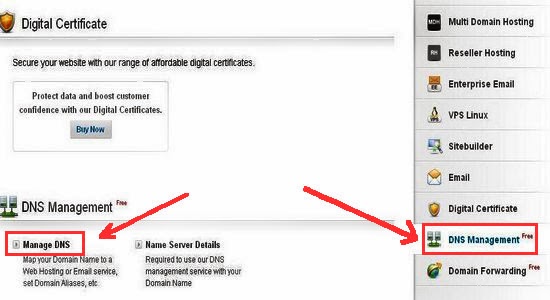
Step-2- Now Find “DNS Management” and then click on “Manage DNS” button.
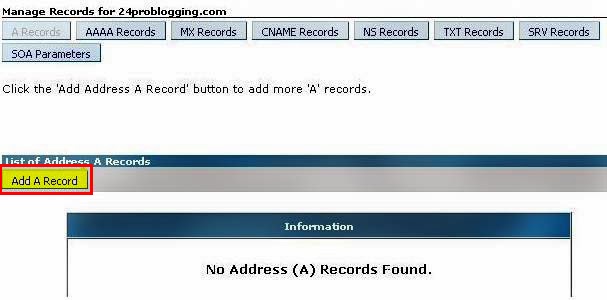
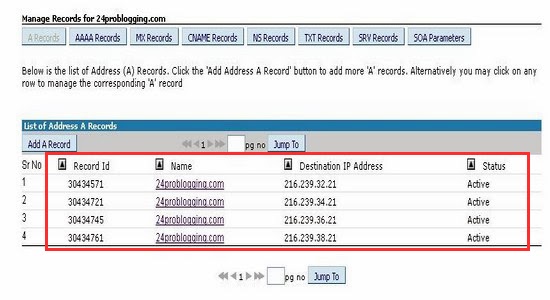
Step-3- Now one popup window will appear, in which click on “A Records” tab. And Click on “Add A Record Button”.
Step-4- Now leave name field as a blank and in IPV4 address field insert following code.
"216.239.32.21"
After It, click on “Modify Record” button.
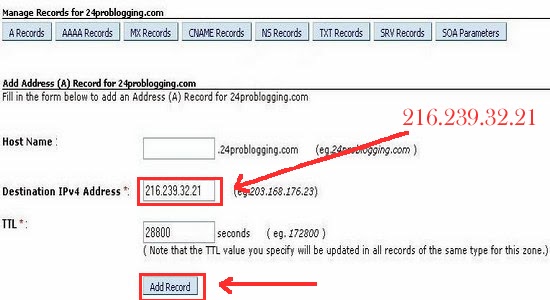
Step-5- Now repeat step-4 three times more to add following three “A Records” in same way.
"216.239.34.21
216.239.36.21
216.239.38.21"
Step-6- After creating 4 different “A Records” for your domain, Go to CNAME tab to add “CNAME Records”. Now click on “CNAME Records” tab and then click on “Add CNAME Record” Button.

Step-7- In Host Name field write “www” and in value field insert following URL.
ghs.google.com
Then, Click on “Add Record” button.

After completing all above sixth steps, you have to setup your Bigrock domain to your blogger blog destination and verify to you blog with BigRock.
Setup Domain Name to Blogger blog and verify your Blog
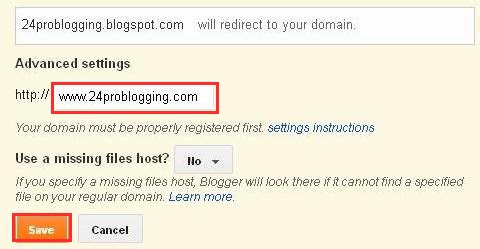
Step-8- Log in your blogger Account, Go to setting > click basic button. Click On Add Custom Domain> Switch to advanced settings > Type your domain name with www (e.g. www.24problogging.com) and click Save button. Then your blog ask you to verify authority on that domain name. Now you have to create another CNAME record in Domain DNS to verify.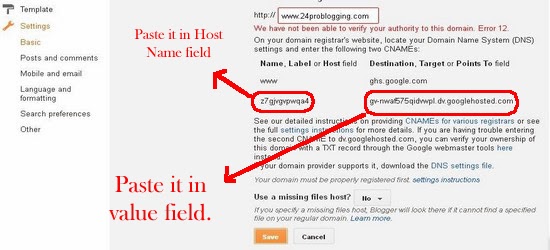
Step-9- Go to your “CNAME Records” tab and then click on “Add CNAME Record” Button. Copy first code and paste it in Host Name field. Similarly copy second code and paste it in “www” and in value field. Then finally click “Add Record”.

Step-10- Now you need to repeat Step No.7 to verify your domain. For this, go to blogger Account. Setting > Basic button, Click on Add Custom Domain> Switch to advanced settings > Type your domain name with www (e.g. www.24problogging.com) and click Save button.
This time, you find there is no error.
It will take 2 hours more to updates DNS settings; See your blog with custom domain after 2 hours and cheer.
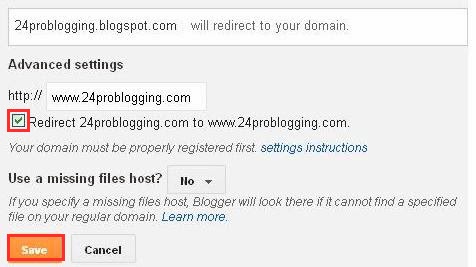
Step-11- After 2 hours, Log in your blogger Account, Go to setting > click basic button. Click On EDIT.Then Tick redirect to without www.Domain name to with www.Domain name and click save button.

---------------------------------------
- You will then need to click on Settings on the left hand side and under settings click on Basic.
- Under Publishing Click on Add a custom domain. Enter your domain name in the textbox and click on Save.

- After you click on save Blogger will throw an error like the one you see in the following screenshot. You will need to add the 2 CNAME records provided by Blogger in the BigRock Manage DNS panel.

- After you have added the CNAME records, it will take approximately 4 to 6 hours for these records to get propagated and after which you can click on save
- Now you have setup www.demomonkey.org but if someone tries to search for just demomonkey.org on the browser will not be able to reach you. For this you will need to create a redirect from demomonkey.org to www.demomonkey.org.
- Click on edit next to the domain name under Settings >> Basic. Just check the box which redirects yourdomainname.com to www.yourdomainname.com and then click on Save.

No comments:
Post a Comment